OBD2 Scanner Not Connecting to ECU: How to Fix It
OBD2 scanner not connecting to ECU You plug in your OBD2 scanner, turn the key, and nothing happens. No connection, no codes, no response. The scanner just sits there saying “no link” or “communication error” while you stare at it wondering what went wrong.
An OBD2 scanner not connecting to ECU is one of the most frustrating problems a car owner can run into — because it’s not the problem you actually wanted to diagnose. You wanted to check why your check engine light was on, and now you’re troubleshooting the diagnostic tool itself.
The good news is that this is almost always fixable, and in most cases it doesn’t require a trip to the dealer. This guide walks through every common cause of an OBD2 scanner not connecting to the ECU, starting with the simplest checks and working through to the more involved electrical diagnosis.
Why “The Fuse Is Good” Doesn’t Mean the Problem Is Solved
If you’ve already checked the OBD port fuse and confirmed it’s not blown, you’ve ruled out the most obvious cause — but there are several other reasons an OBD2 scanner can fail to connect even with a perfectly good fuse. The OBD2 port relies on a working power supply, a solid ground connection, functioning communication pins, and a responsive ECM on the other end. A blown fuse is just one link in that chain.
This is actually useful information. Knowing the fuse is good means you can skip straight past that check and focus on the parts of the system more likely to be the actual culprit.
How the OBD2 Port Actually Works
Before troubleshooting further, it helps to understand what’s supposed to happen when you plug in a scanner.
The OBD2 port has 16 pins, though not all vehicles use every pin. The key ones for basic connectivity are:
- Pin 16 — Battery power (constant 12V)
- Pin 4 — Chassis ground
- Pin 5 — Signal ground
- Pin 6 and 14 — CAN High and CAN Low (the most common communication protocol on vehicles 2008 and newer)
- Pin 7 and 15 — K-line and L-line (older ISO 9141 protocol, mostly on pre-2008 vehicles)
- Pin 2 and 10 — SAE J1850 protocol pins (older domestic vehicles)
When you plug in a scanner, it first checks for power on pin 16 and ground on pins 4 and 5. If those are present, it attempts to establish communication using one of several possible protocols until it finds the one your vehicle uses. If any of these foundational connections are missing or faulty, the scanner can’t even begin the handshake process with the ECM — resulting in the “no connection” or “no response” error you’re seeing.
Common Causes of an OBD2 Scanner Not Connecting to ECU
1. Power Issue at the OBD2 Port (Even With a Good Fuse)
A good fuse means power is available upstream, but that doesn’t guarantee power is reaching the actual port. Corrosion inside the port itself, a damaged wire between the fuse and the port, or a loose connector behind the dashboard can all interrupt power delivery even though the fuse tests fine.
How to check: Use a multimeter with the ignition on. Set it to DC voltage and probe pin 16 (typically the top-right pin when looking at the port) against a known good ground. You should read close to battery voltage — around 12V. If you’re reading significantly less or nothing at all, the fault is in the wiring between the fuse and the port, not the fuse itself.
2. Bad Ground Connection at the Port
Just as important as power, the OBD2 port needs reliable ground connections on pins 4 and 5. A corroded ground point somewhere in the chassis, a loose ground strap, or damaged wiring between the port and the ground point will prevent the scanner from establishing communication — even with perfectly good power.
How to check: With the multimeter still in DC voltage mode, measure resistance between pin 4 (chassis ground) and a known good ground point, like the negative battery terminal or an unpainted metal bracket. You should see continuity — essentially zero resistance. Any significant resistance indicates a ground fault.
3. Damaged or Corroded OBD2 Port Pins
The pins inside the OBD2 port itself can become bent, pushed back into the housing, or corroded over time — particularly on vehicles where scanners have been plugged and unplugged frequently, or on vehicles that have been exposed to moisture in the footwell.
How to check: Visually inspect the port with a flashlight. Look for bent pins, green or white corrosion, or any pins that appear pushed back compared to the others. A small dental pick or similar tool can gently straighten a slightly bent pin, but a severely damaged port usually needs replacement.
4. Wiring Harness Damage Between the Port and the ECM
The OBD2 port doesn’t directly contain any intelligence — it’s simply a connection point wired back to the various modules in the vehicle. A damaged wire anywhere along the harness between the port and the ECM, the CAN bus network, or other modules can prevent the scanner from communicating, even though power and ground at the port itself test fine.
This is harder to diagnose without a wiring diagram for your specific vehicle, but it’s a realistic cause — particularly on vehicles that have had aftermarket wiring work done near the dashboard, steering column, or kick panel where the harness typically runs.
5. CAN Bus Network Fault
If your vehicle uses the CAN protocol (most vehicles from 2008 onward), a fault anywhere on the CAN bus network — not just at the OBD2 port — can prevent a scanner from connecting. This includes shorts between CAN High and CAN Low, an open circuit in the CAN wiring, or a failed termination resistor.
How to check: With the ignition off and nothing plugged into the OBD2 port, measure resistance between pin 6 (CAN High) and pin 14 (CAN Low) at the port. A healthy CAN bus reads approximately 60 ohms. A reading near zero indicates a short. A reading significantly higher than 60 ohms indicates an open circuit or a failed termination resistor somewhere on the network.
6. Dead or Severely Discharged Battery
A battery that’s extremely low — not just weak, but critically discharged — may not provide enough voltage for the OBD2 port to power up properly, even if the fuse and wiring are completely fine. This is less common but worth ruling out, particularly if the vehicle has been sitting unused for an extended period.
How to check: Test battery voltage directly at the terminals. Anything below about 11.5V at rest is concerning and may not provide adequate power to the OBD2 system. Charge or jump-start the battery and retest the scanner connection.
7. Faulty ECM or Other Module
If power, ground, the port itself, and the CAN bus network all test correctly, the issue may be with the ECM or another module not responding to the scanner’s communication attempts. This is less common than a wiring or connector issue but does happen — particularly after a module has experienced water damage or an electrical surge.
8. The Scanner Itself
It’s worth ruling out the scanner before spending hours diagnosing the vehicle. Try the scanner on a different vehicle if possible. If it works fine elsewhere, the problem is definitely in your vehicle. If it doesn’t connect to any vehicle, the scanner itself may be faulty, or its cable may have an internal break — a surprisingly common failure point on cheap aftermarket scanners and OBD2 Bluetooth adapters.
9. Aftermarket Alarm or Remote Start Installation
If your vehicle has an aftermarket alarm system, remote starter, or other electrical accessory installed, it’s possible the OBD2 port wiring was tapped into or rerouted incorrectly during installation. This is a surprisingly common cause of an OBD2 scanner not connecting to ECU on vehicles with aftermarket electronics. Poorly installed accessories can interfere with or completely block CAN bus communication.
10. Incorrect Scanner Protocol Setting
Some scanners, particularly older or budget models, require you to manually select the communication protocol rather than auto-detecting it. If your scanner is set to the wrong protocol for your vehicle’s year and make, it won’t connect even though everything else is working correctly. Check your scanner’s manual for how to set or verify the protocol, and try manually selecting CAN, ISO 9141, or J1850 depending on your vehicle’s age.
Step-by-Step Diagnostic Process
Step 1 — Confirm the basics
Turn the ignition to the “on” position (engine doesn’t need to be running) and make sure the scanner is fully and firmly plugged into the port. A scanner that’s not fully seated is one of the simplest and most overlooked causes of a failed connection.
Step 2 — Try a different scanner
If you have access to a second OBD2 scanner or app-based adapter, try it. This immediately tells you whether the problem is the original scanner or the vehicle.
Step 3 — Test power at the port
With a multimeter, confirm 12V is present at pin 16 with the ignition on. If it’s not there despite a good fuse, trace the wiring between the fuse box and the port.
Step 4 — Test ground at the port
Confirm pins 4 and 5 have solid continuity to chassis ground. A bad ground here prevents communication just as effectively as a power issue.
Step 5 — Inspect the port physically
Look inside the port for bent, corroded, or recessed pins. Gently probe each pin with a multimeter lead to confirm it makes proper contact.
Step 6 — Check CAN bus resistance
If your vehicle is 2008 or newer, measure resistance between CAN High and CAN Low at the port with the ignition off. Compare to the expected 60-ohm reading.
Step 7 — Check the battery
Confirm battery voltage is healthy — at least 12V at rest. A severely discharged battery can prevent proper module communication.
Step 8 — Check for aftermarket wiring interference
If the vehicle has an aftermarket alarm, remote start, or other electrical accessory, inspect the installation near the OBD2 port and steering column for signs of improper wiring or taps into the CAN bus circuit.
Step 9 — Try manually selecting the protocol
If your scanner allows manual protocol selection, try each available protocol rather than relying on auto-detect, particularly on older vehicles.
How to Fix an OBD2 Scanner Not Connecting to ECU
Repair power wiring to the port — If voltage isn’t reaching pin 16 despite a good fuse, trace and repair the damaged section of wiring between the fuse box and the OBD2 port.
Repair ground wiring — If pins 4 or 5 show poor continuity to ground, locate and repair the ground connection, which may be a chassis ground point that’s corroded or a wire that’s broken somewhere in the harness.
Clean or replace the OBD2 port — Corroded pins can sometimes be cleaned with electrical contact cleaner and a small brush. Bent pins can occasionally be carefully straightened. A severely damaged port typically needs to be replaced as a unit, which is a relatively simple repair involving unbolting the port from its mounting bracket and reconnecting the harness to a new unit.
Repair CAN bus wiring — If resistance testing reveals a short or open circuit on the CAN bus, the damaged section of wiring needs to be located and repaired. This may require tracing the harness from the port toward the affected modules.
Charge or replace the battery — If the battery is severely discharged, charge it fully and retest. If it won’t hold a charge, replace it.
Remove or correct aftermarket wiring — If an aftermarket alarm or remote start installation is interfering with the OBD2 circuit, have the installation inspected and corrected by a qualified installer.
Replace the scanner — If testing confirms the vehicle’s OBD2 system is healthy but the scanner still won’t connect to any vehicle, the scanner itself needs to be replaced.
Have the ECM diagnosed — If everything else tests correctly and the ECM still isn’t responding, professional diagnosis of the ECM itself may be needed. This is the least common outcome but is worth considering after everything else has been ruled out.
What It Might Cost to Fix
| Repair | Estimated Cost |
|---|---|
| Battery charge or jump start | Free – $20 |
| Replacement battery | $80 – $200 |
| OBD2 port cleaning (DIY) | Free |
| OBD2 port replacement | $30 – $150 |
| Wiring repair (power or ground) | $100 – $350 |
| CAN bus wiring repair | $150 – $500 |
| New scanner / OBD2 adapter | $20 – $150 |
| Aftermarket accessory wiring correction | $100 – $400 |
Costs vary by vehicle make, model, and the complexity of the wiring fault.
Related Articles
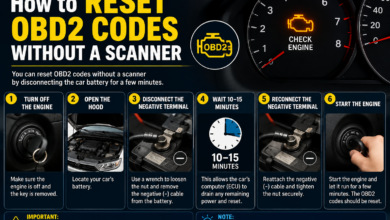
- How to Reset OBD2 Codes Without a Scanner
- How to Fix Check Engine Light
- U0100 Code — Lost Communication With ECM/PCM
- U0001 Code — High Speed CAN Communication Bus
Frequently Asked Questions
Why is my OBD2 scanner not connecting to ECU if the fuse is fine? A good fuse only confirms power is available at the fuse box — it doesn’t guarantee that power is reaching the OBD2 port or that ground, the port pins, and the CAN bus wiring are all functioning correctly. The most common causes beyond a blown fuse are a wiring fault between the fuse and the port, a corroded ground connection, or damaged pins inside the port itself.
Can a dead battery cause an OBD2 scanner not connecting to ECU? Yes, particularly if the battery is severely discharged rather than just slightly weak. The OBD2 port and the modules it communicates with need adequate voltage to function. Always check battery voltage as part of troubleshooting a connection failure.
How do I know if it’s my scanner or my car causing the connection failure? Try the scanner on a different vehicle. If it connects fine elsewhere, the problem is in your vehicle’s wiring or port. If it fails to connect to multiple vehicles, the scanner or its cable likely has an internal fault.
Can an aftermarket alarm cause an OBD2 scanner not connecting to ECU? Yes. Poorly installed aftermarket alarms, remote starters, and other electrical accessories sometimes tap into or interfere with the OBD2 port wiring or the CAN bus network. If your connection issue started after an aftermarket installation, that’s a strong place to start investigating.
Is it expensive to fix an OBD2 port? Not usually. A replacement OBD2 port itself is inexpensive, typically $20-50 for the part. Labor is straightforward since the port is generally easy to access under the dashboard. The bigger cost driver is if the underlying issue is wiring damage that requires more extensive harness repair.
Will cleaning the OBD2 port pins fix a connection issue? It can, if corrosion or debris in the port is the cause. Use electrical contact cleaner and a small non-metallic brush to clean the pins gently. Avoid using anything that could bend or damage the pins further. If cleaning doesn’t resolve the issue, move on to testing power, ground, and CAN bus continuity.
For more information on OBD2 diagnostic standards, visit the SAE International standards library or the National Highway Traffic Safety Administration (NHTSA).
This guide is for informational purposes only. For an accurate diagnosis, always consult a qualified mechanic.